‘British conditions’ is a term known worldwide in mountain biking circles. Wet, sloppy and mucky trails, the mud you find thanks to a heck load of rain. That’s typically British. Danny Hart is a classic example of a Brit smashing it out of the park at the 2011 World Championships at Champery. No doubt down to his familiarity with riding in such filthy conditions.
Ok, that was awesome, but where does gravel riding come into all this? Well, if you’re riding through the winter in the UK, you’ll certainly come across a fair bit of the sloppy stuff. Time for that grippier rubber, and perhaps the great opinion divider; the mudguard?
Although there are a few mudguards on the market suitable for larger volume gravel tyres, none seem to have really taken off. SKS, Velo Orange and Honjo’s offerings are all pretty akin to randonneur style guards. That’s where mountain biking brand Mudhugger comes in with something totally different.
Introducing the Gravelhugger
Fed up with the mess they’d end up in after mountain bike rides in ‘British conditions’, Jamie and Bruce founded Mudhugger from their base in Shropshire to make front and rear mudguards for mountain bikes in 2012. Just a few years later and now they’re a household name in those circles, and turning their focus to a new challenge and opportunity; the gravel market.
It’s undeniable that mudguards designed for off-road use suffer a lot more abuse than road guards. We’re not just talking about watery splatter here, but stones and cloying clay that can block, or even worse, damage some conventional guards if there’s insufficient clearance.
The demands for the off-road rider are different too, perhaps more selfish. Keeping your derrière dry and clean and keeping the muck out of your face can make a big difference to how enjoyable long winter rides can be, but with less drafting like on the road, the need to protect others from trail filth is much less pressing.

Gravelhugger specifics
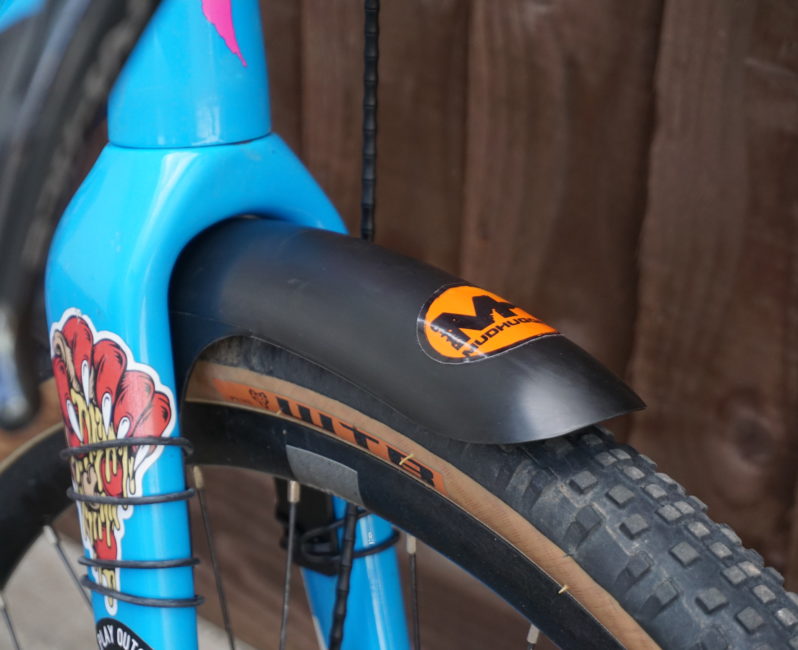
Available for general purchase from June 2020, the new Gravelhuggers are available for both the front and rear, fitting tyres up to 42mm on 700C wheels and 50mm on 650B wheels, although this does depend on your fork clearance too. The front Gravelhugger passes through the fork, reducing the clearance, whereas the rear attaches above the seatstays, not affecting clearance at the back between tyre and frame.
The front Gravelhugger comes in at £25 and weighs 73g (claimed 75g), and rear £23 weighing a claimed 200g, delivered free in the UK with a purchase direct from their online store. Unlike many of their jazzy or custom mountain biking guards, these are plain black, with a small, laser etched Mudhugger logo on each (or stickers until lockdown allows).
Although we’ve just been sent the new production model front Gravelhugger, I’ve been running the prototype models for a few of the wettest winter months, which have been a good test! These were made from the same material, two sides shaped and joined down the centre with heavy duty tape. These prototypes were attached using cable ties only, and as you’ll see the new model is secured using o-rings.

Set up and frame protection
I hadn’t realised just how much of a faff conventional mudguards can be until a few years ago setting some up on a winter road bike. A few hours later they were dialled in, struts sawn to perfection and I certainly wouldn’t be taking them off for months. For comparison, the more recent GravelHugger setup took about fifteen minutes, and can be removed in about two.
The Gravelhuggers are supplied with helitape, a transparent, thick frame protector, which you’ll need to use to prevent any nasty wear to your paint job on the forks or seat stays. Even if you’re running invisiframe (a thinner transparent tape to protect paint) you’ll need to add these to the areas where the o-rings meet the frame and forks. It only takes a small amount of dirt and grit to get embedded into these areas to wear through even robust paint, leaving a nasty scar when it comes to removing the guards for the dusty trails of summer.
Take your time, get it right
I’d say that it’s worth taking your time fitting the helitape really nicely, or get a mechanic to help you. As forks and seat stays can come in some rather interesting shapes and tapers, you may need to cut slits or notches into the tape to help it fit snugly. If you don’t you’ll end up with gaps that allow muck ingress. This is unsightly at best, and potentially damaging to your paintwork at worst.
Once you’ve lined up the helitape, you can simply add the guards using two o-rings on each side for the front Gravelhugger, to the hooks that sit on the inside of the fork legs. This part is super simple and takes just a minute or two. The Gravelhugger is supplied with two different sizes of o-rings (50mm or 70mm), so you should be able to find the right size for a multitude of fork types including bladed carbon and round steel forks. Forget looking for bikes with mudguard mounts, given the right clearance these’ll fit to most frames.
View this post on Instagram
If you’d prefer a more secure, longer term fitting, you can use cable ties to attach the guards. Pay attention with leaving any sharp ends on these. You’d be surprised how much damage a rogue cable tie end can cause. One of my friends has the scar to prove it!
Gravelhugger in action
So a very simple design and easy to install, but what’s the actual result? Well firstly let me comment on the aesthetics. The front Gravelhugger is very sleek and hardly noticeable. Fitting snugly under the fork crown and close to the front tyre in profile with the bike. It’s sneaky and subtle, I don’t mind it at all.
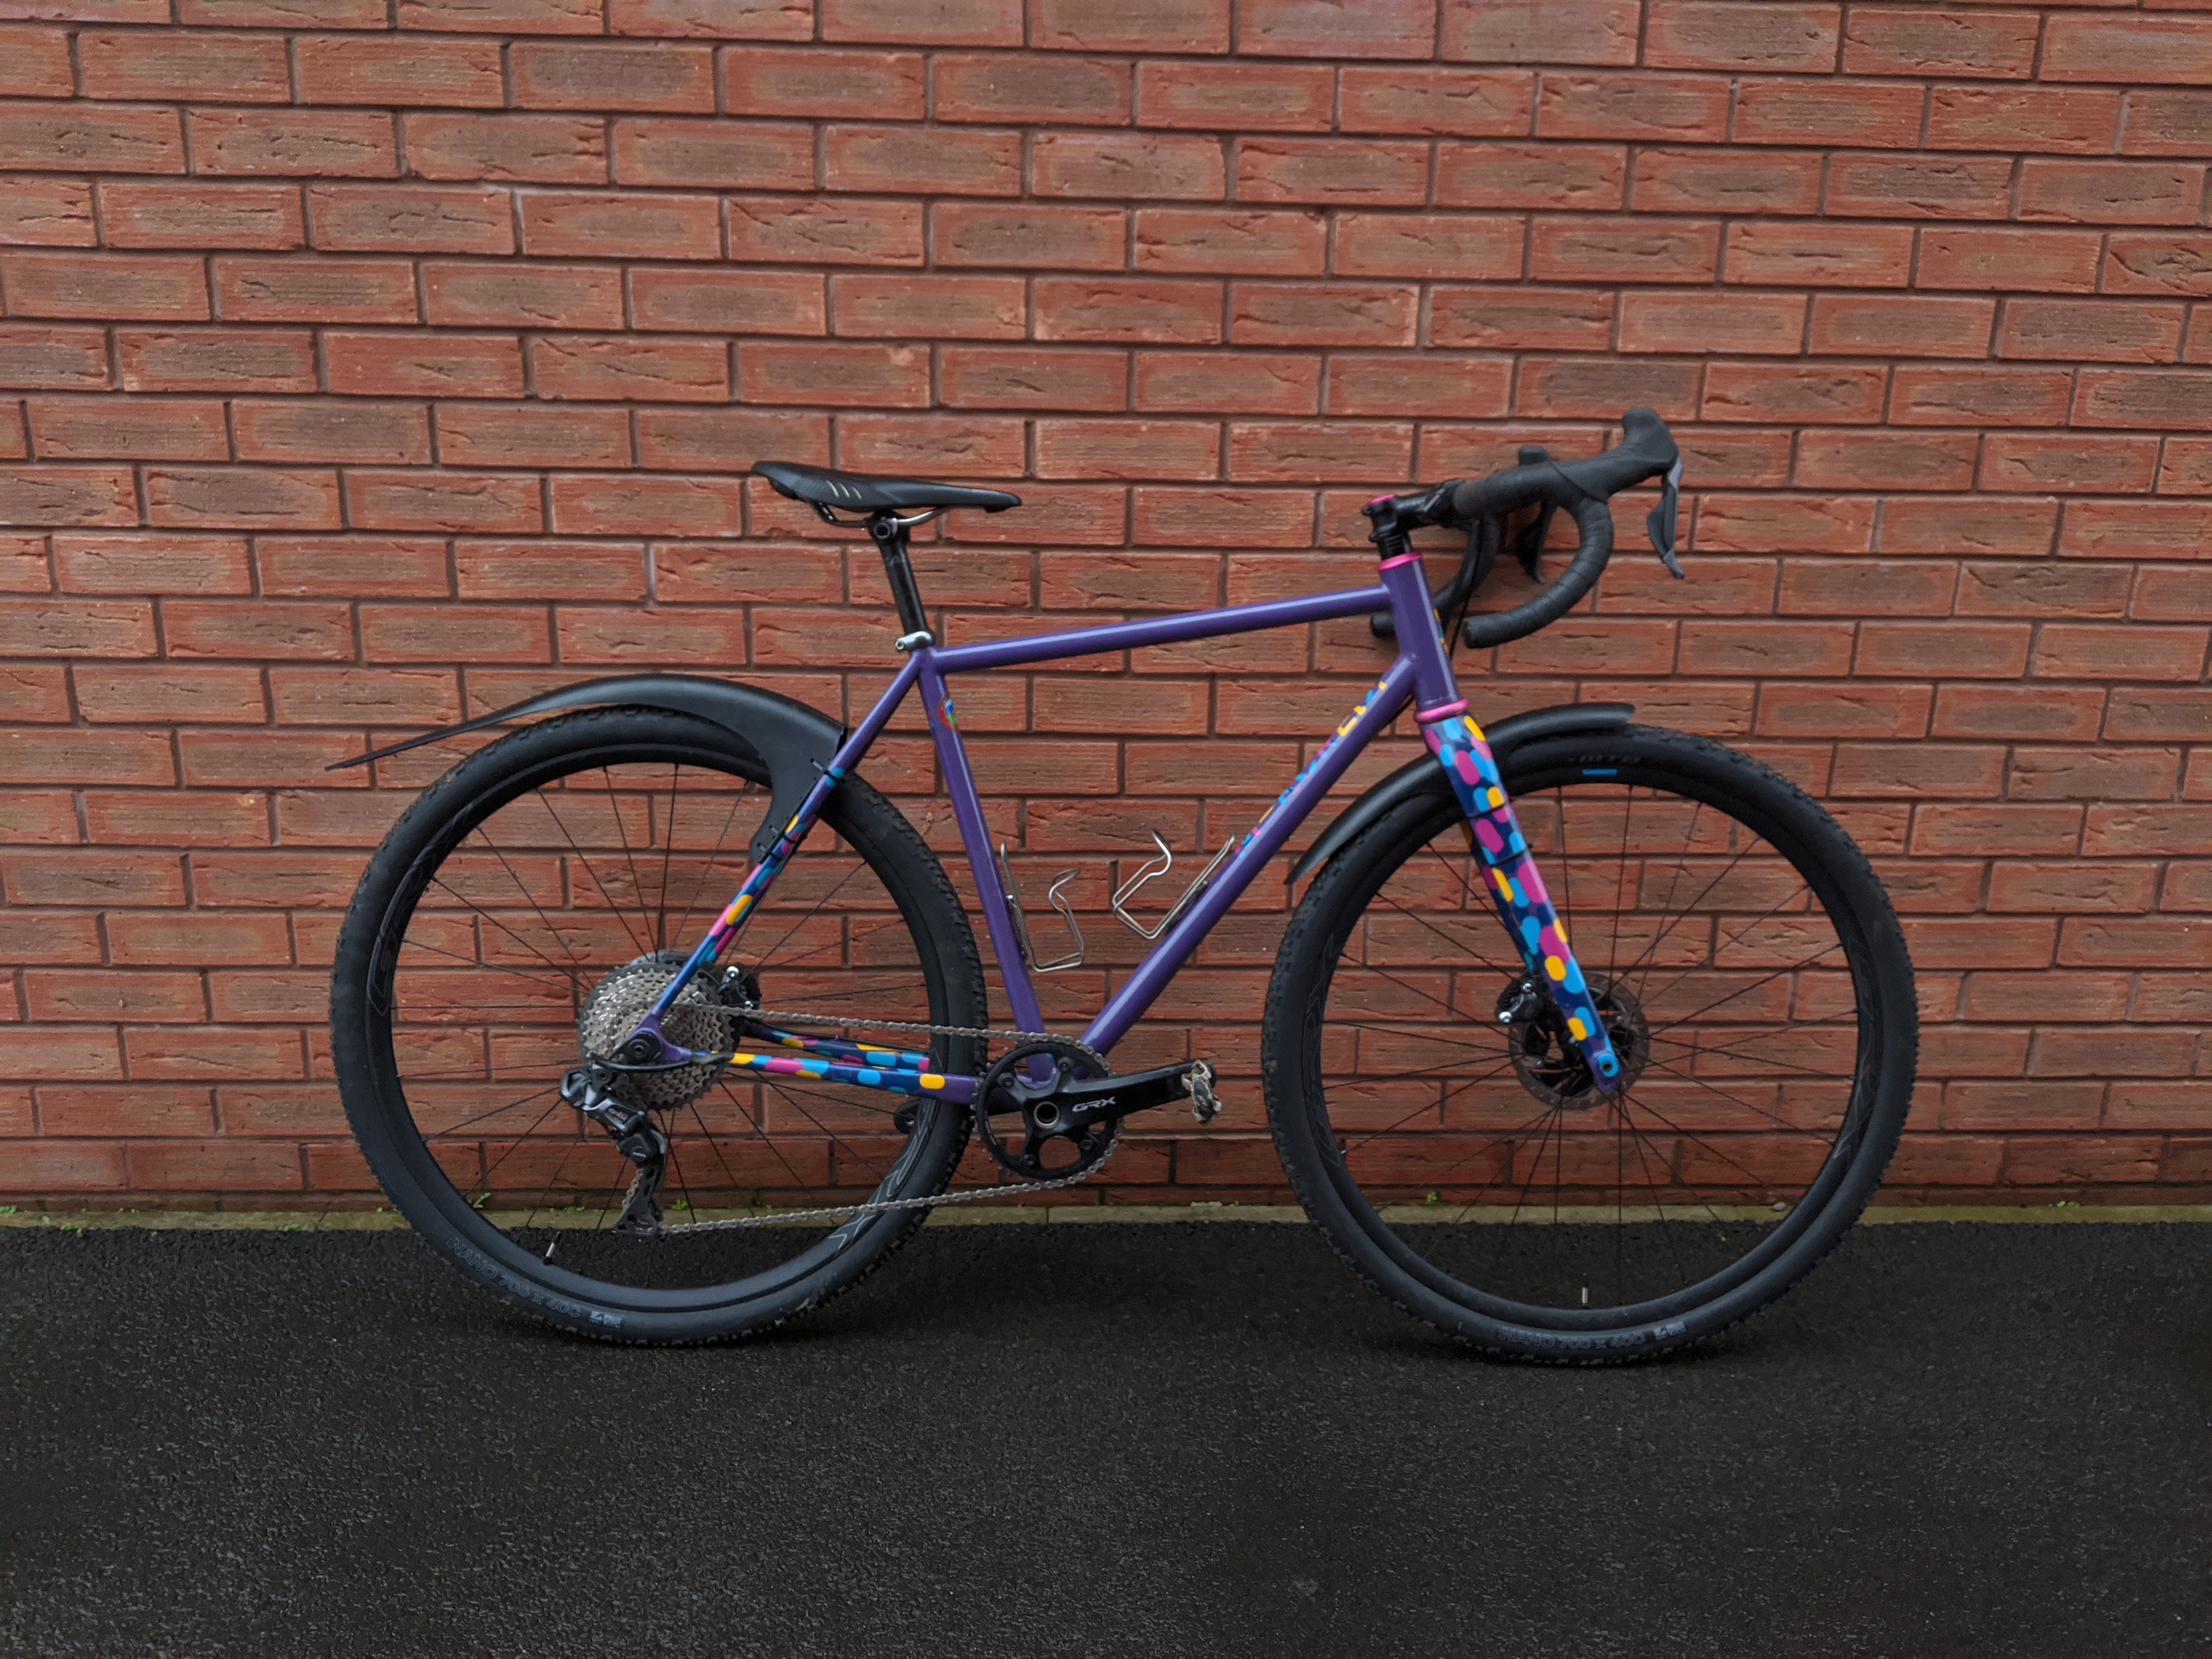
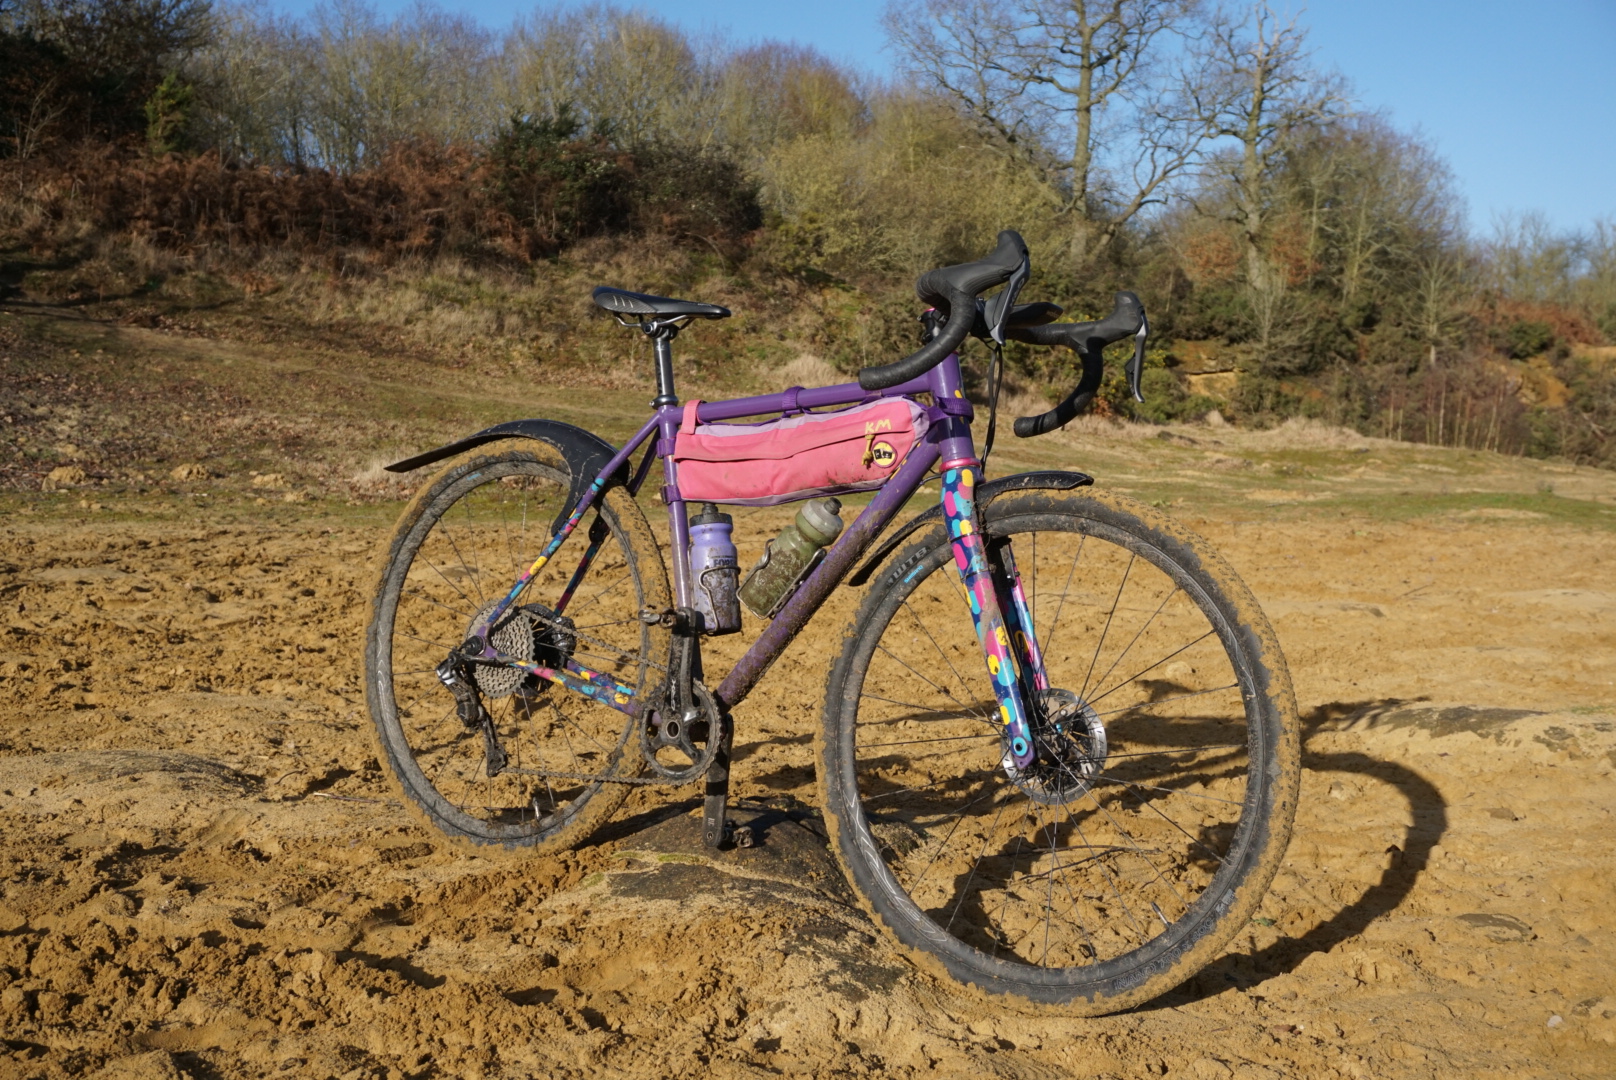
The rear Gravelhugger is much more obvious. The thick and deep plastic shell from the seat stays tapers out, rather than following the curvature of the wheel. The common objections to mudguards came to mind when I attached this onto my gorgeous custom steel bike. In my eyes at least it is a bit ugly. Is that the price you pay for a dry bum?
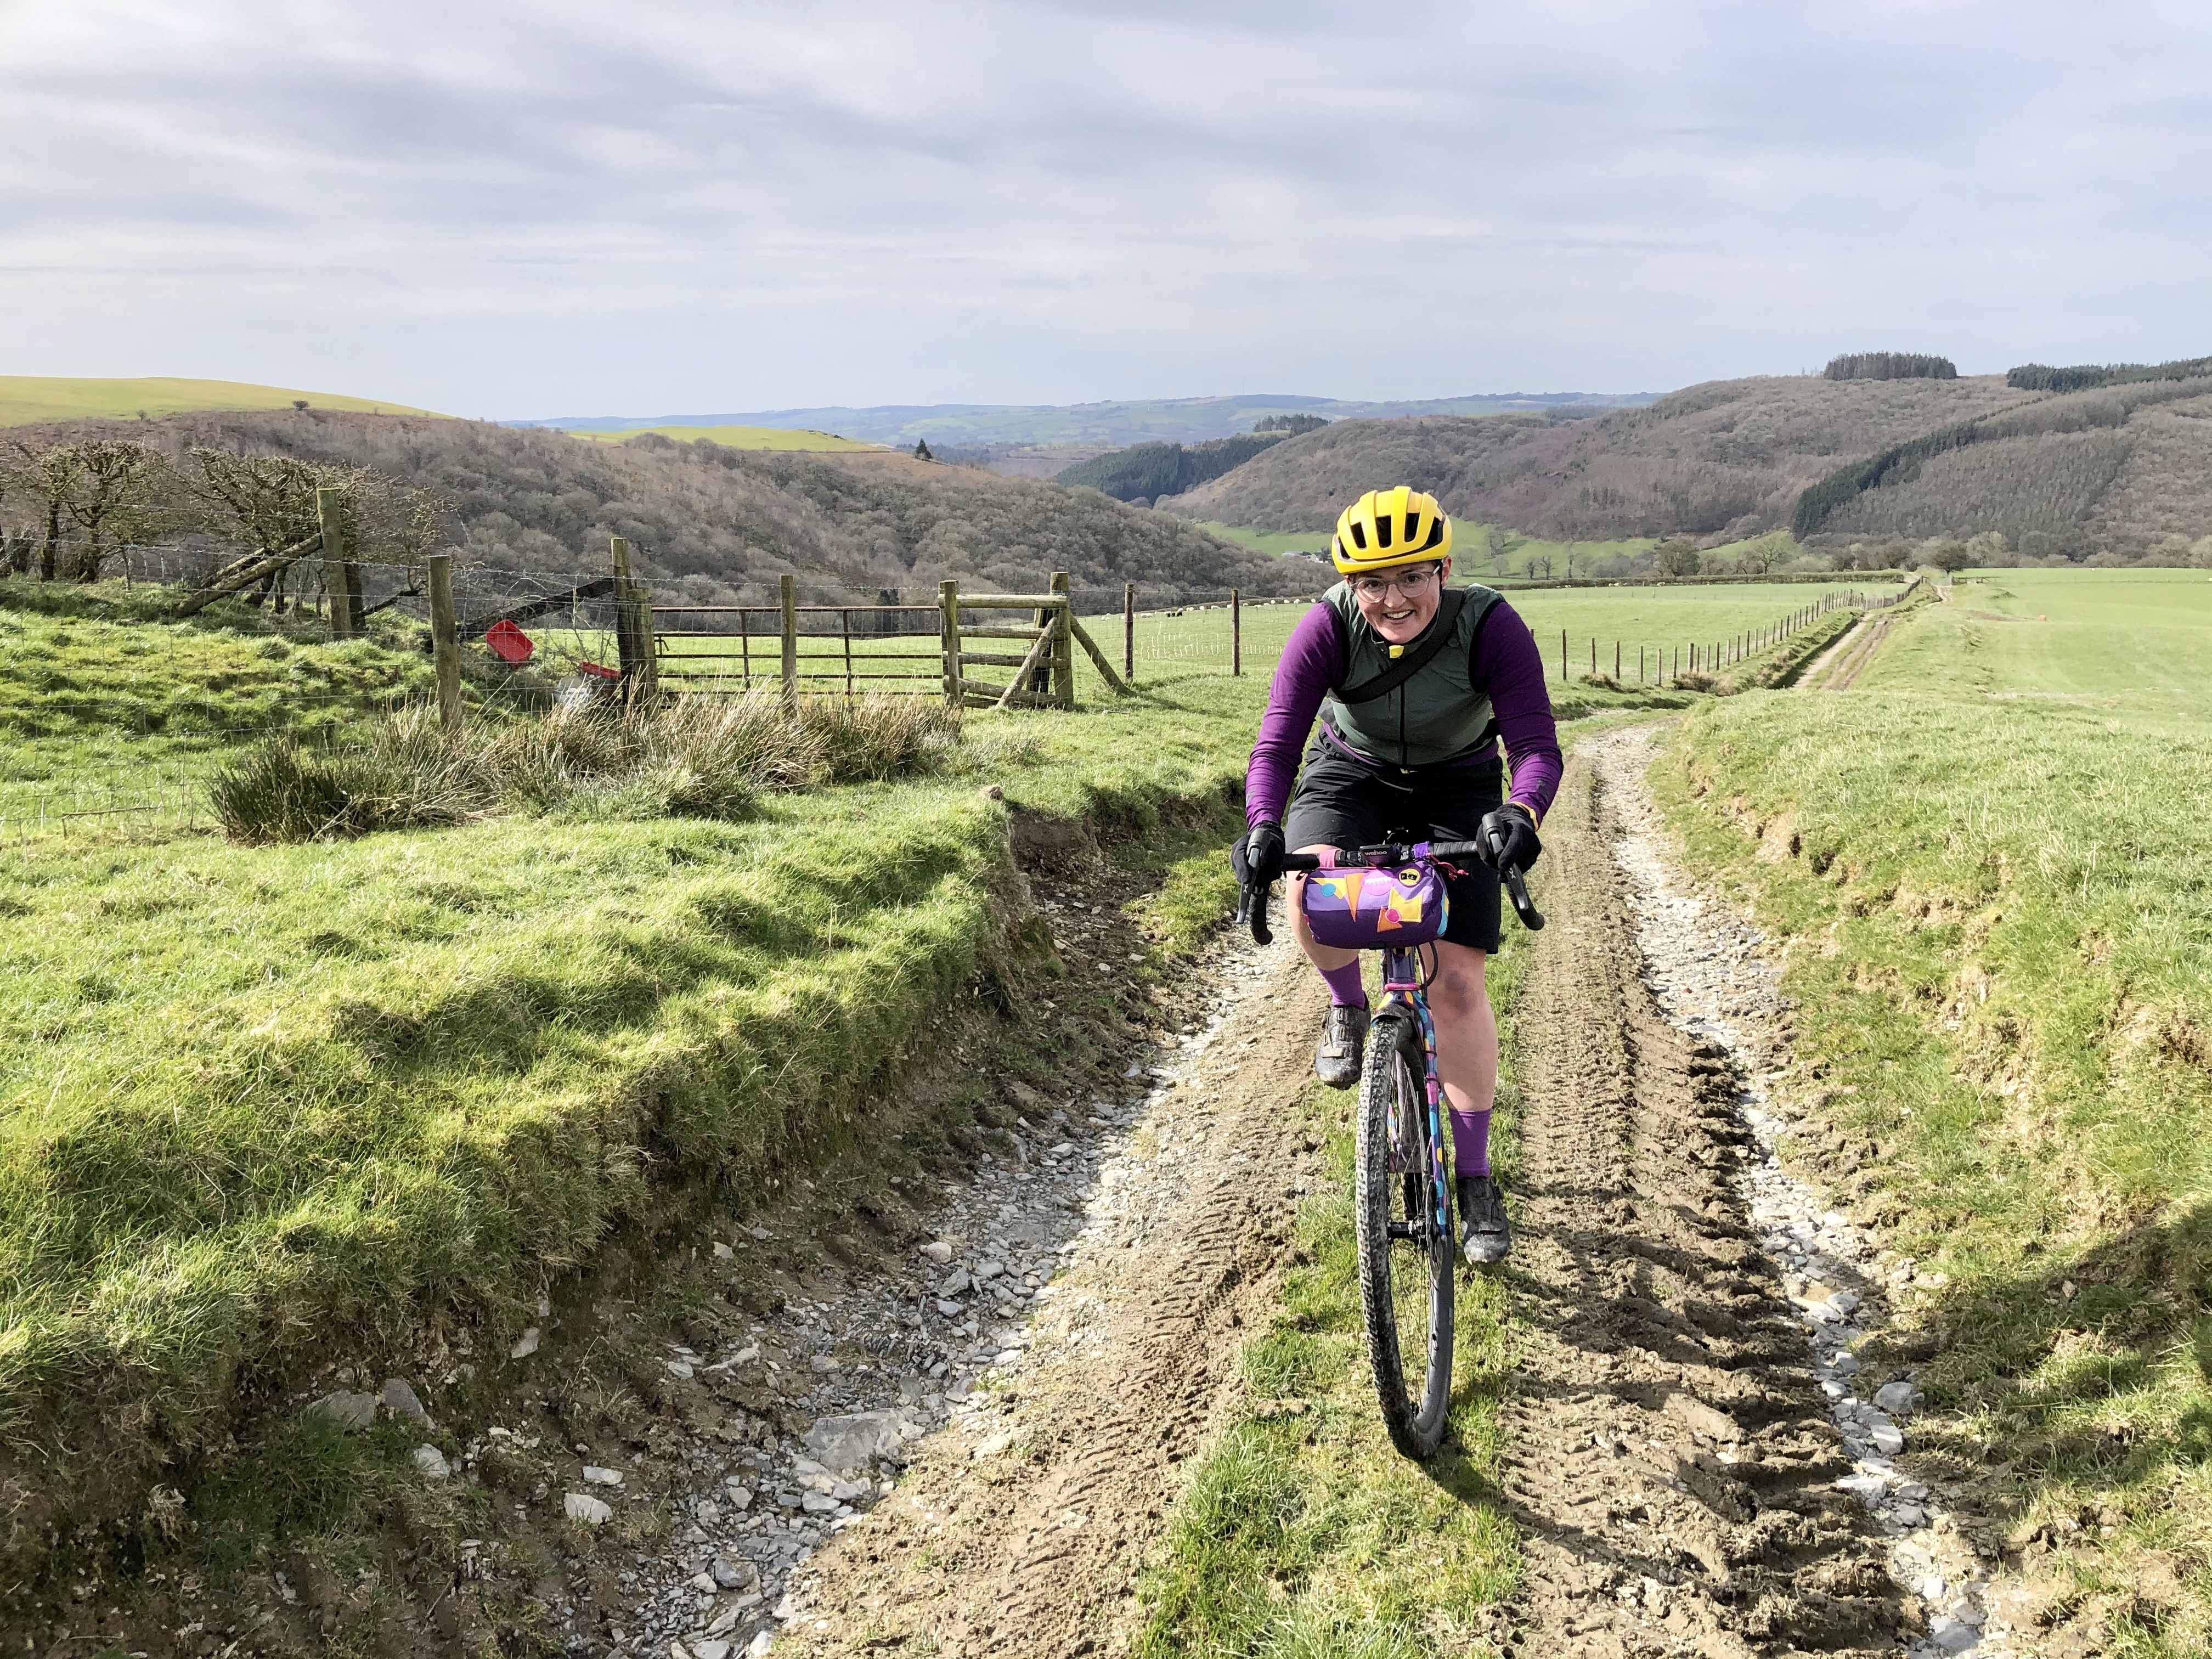
Well yes, it is. It’s a totally overused phrase these days, but riding through the winter has been nothing short of a game-changer. You know that feeling when not only water but also dirt and grit seeps through your bib tights? Lets just say it’s best avoided, and with the Gravelhugger you certainly can!
Clearance
The clearance between the tyres and guards (I ran a 40mm WTB Nano on 700C Shimano GRX rims) is plentiful. Even with the claggiest mud they don’t clog up. When you leave the trail and rejoin the tarmac, there won’t be any protection for the rider behind you. So it’s still worth keeping a little distance between riders when riding at greater speeds like on paved surfaces.
With the rear Gravelhugger in place, you can run a saddle pouch or bag without worrying about it getting filthy. Or enjoy not having mud flick up onto your rucksack or bumbag.
I feel that the sleeker front Gravelhugger offers a less substantial benefit than the rear. Although much less than with no guard at all, I still found myself with a dirty face at the end of the worst of winter rides.

Green advantages
As well as potentially reducing component wear through less dirt ingress (I’m thinking particularly about protecting dropper posts and headsets), the way that the Gravelhugger is made and supplied is pretty green too. Gravelhuggers are made from 100% recycled polypropylene, which you can recycle (again) at the end of life. Reusable nitrile O-rings replace the prototype cable ties to reduce plastic waste. The guards are made in the UK and supplied in recyclable cardboard boxes with minimal plastic packaging.
Verdict
Before trying the Gravelhuggers, I have to say that I thought mudguards for off-roading was a bit of a cop-out. You’re gonna get filthy anyway, so why bother with the extra weight and faff? The incredibly wet winter may have had something to do with changing my mind. Along with discovering how much a difference a dry, rather than soggy and gritty, rear end can impact on how good you feel at the end of a ride.
The Gravelhugger are simple to attach and weigh no more than 300g all in fitted. This simple solution is effective and reasonably priced at £48 for the pair. I found that the rear guard gave the greatest benefit, although less pleasing on the eye to the front guard. If I was in the market for these I’d consider saving a bit of cash and just run the rear.
The Gravelhuggers are well made and robust. They’re not showing any wear despite a few months of heavy use in very mucky conditions. Although I’ve removed them for the brief spell of dry and dusty trails, I think with some fresh helitape I’ll be popping them back on when the weather turns sour again.
The only real downside that I found was the helitape application to protect the frame and forks. I did mine the first time in a bit of a rush. So I ended up with a bit of a gap that filled over time with muck. There’s been no damage, it just looked pretty grim and was hard to clean under there. Next time I’ll be more precise!
Gravelhugger Mudguards
£25 Front, £23 Rear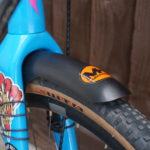
Pros
- Easy set up
- Good value
- Lightweight yet robust
Cons
- Helitape necessary to protect frame which can trap dirt if applied hastily
- Only helps you, not anyone else!
- Rear Gravelhugger not the most aesthetically pleasing
Last modified: 29th October 2020


Great review, balanced and useful. Thanks.
Whats the frame / bike? Looks nice.
It’s a pretty cool looking bike, right? It’s a custom build from Mercredi Bikes. You can find out more about Katherine’s Colourpop CX over here: http://mercredi.co.uk/katherine-cx/
to help with the aethetics could you spray paint them?
Are O rings supplied for the rear hugger as well?According to their website, they just mentioned zip ties. Thanks
Best to check directly with Mudhugger – with some samples they’ve been supplied, and others not. We’d like to say you get the option but best double check before!
The rear looks different to the one currently sold? The one now sticks out in the air, it’s the only thing putting me off. The one for the front however is perfect.